A Beginner’s Guide to Drawing a Basic Outfit on a Character in Photoshop
 |
| A Beginner’s Guide to Drawing a Basic Outfit on a Character in Photoshop |
How to design clothes for beginners - by Dean Carianas-Mannar
This post is part of a series called Anime and Manga Illustration.
How to Draw and Color Anime-Styled Eyes in Adobe Photoshop
How to Draw and Vector a Kawaii Vampire Chibi in Illustrator
Drawing clothing can be great fun, and there’s so much scope for design that you can really let your imagination take over. This tutorial will cover the basic theories behind drawing clothing, and provide a walk through for a simple outfit, plus show a couple of other design ideas for you to consider. We’ll be using vector tools available in Adobe Photoshop, so let’s begin!
Tutorial Asset
The following asset was used during the production of this tutorial.
Anime Base - feel free to use this base should you wish to follow along.
1. Consider the Fabric Type
When designing clothing for your character, there are a couple of main points to consider. Firstly, and most importantly, clothes are (generally speaking) made from fabric, which comes in many different weights and textures. These different fabrics will fall differently over curves. As an example, think of the tough, thick denim that jeans are made from in comparison to a light weight thin cotton that you’d find a summer skirt to be made from. Naturally, if you were to make the same garment from these two different fabrics, the way they would hang when worn would differ greatly from each other. You’d also need to consider the way the garments are made to fit. For example, heavier fabrics such as denim are usually made with a flat waist band, while lighter fabrics can be easily made with an elastic waistband, creating further folds in the material.

2. Consider the Clothing Purpose & Preparing Your File

The next point is considering the purpose of the outfit you’re designing. For example: is your character a princess or a martial artist, a student or an undercover spy? Is the main point of the clothing for look or for utility, or a mixture of both? With this in mind, we’ll be working on an everyday type outfit in this tutorial.
I have provided a simple base that you can download to use for drawing your clothes so you can follow this tutorial, and for general practice. The first thing you’ll need to do is open that file and create a new layer (CTRL + SHIFT + N) above the existing "base" group and "white" layer. Call this new layer "sketch1."
3. Start with a Simple Sketch

On this layer, you can start to sketch out a very rough idea of what clothing you’d like to draw on your character. This walk through features a simple top, skirt, boots, and accessories, but you will find ideas for other garments further down. Start with drawing very simple shapes, we’ll add details afterwards.
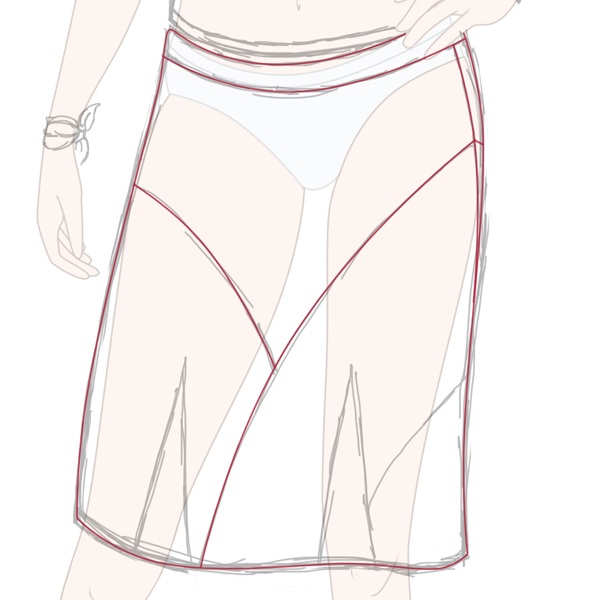
4. Add Minor Details Such as Seam Lines

Sketch in details once you’re happy with your basic shapes - adding seam lines can help you figure out the direction of the fabric, and also figure out what make a viable and realistic item of clothing.
5. Add Interest to Your Design Using Patterns

Patterns and designs can help your basic clothing to look more interesting.
6. Add Details to the Boots by Sketching Laces and Zips

When adding detail to the boots, think about how laces work and the different ways they can be threaded. I’ve opted for a traditional cross-over method, tied at the top. Considering realistic design, I have also added a line down the inside to represent a zip.
7. Hide Your Base to see how Your Sketch is Looking

Hide your base layer occasionally, to see how your sketch is coming along.
8. Add Accessories to Create Additional Points of Interest

Here I’ve added a few accessories such as wrist bands and a ring, and drawn a heart motif on the boots for a bit of added interest. I’ve also hidden the base colors to see how the sketch looks only against a line art.
9. Begin Creating Your Refined Sketch
When you’re happy with your basic sketches, you will need to Create a New Layer above (CTRL + SHIFT + N) and call this new layer "sketch2". Next, lower the Opacity of your base and initial sketch layers so you can start to add your neater second sketch. The process for this is described in my previous tutorial, Creating a Vector Anime Character in Adobe Photoshop – Part 1: Sketch and Line Art.
10. Hide Your Initial Sketch

Once you’ve finished your second sketch, you can hide your first sketch layer, leaving you with something similar to the example below.
11. Begin Creating Your Vector Line Art

You are now ready to begin the vector line art, as explained in my previous tutorial, linked in Step 9. Remember to add holes in the boots for the laces, but don’t add the line art for the laces themselves, we’ll work on those in the coloring stages. To begin the line art, Create a New Group Folder and name it "lines."
12. Finish Your Line Art

Once you have finished your line art, you can hide the "sketch2" layer. You should now have something that looks similar to the example below.
13. Add Color to Your Clothing Design

Create a New Group Folder below your "lines" group and above your hidden "sketch2" layer. Name the new group folder "color." Following the process outlined in the first part of my previous tutorial, Creating a Vector Anime Character in Adobe Photoshop – Part 2: Coloring, add your base colors for the clothing. Never use black (#000000) or white (#FFFFFF) for clothing base colors unless you are doing a monotone black/white image. Use off-whites and slightly saturated greys instead.
14. Add the Laces to the Boots

Once you’re happy with your base colors, create a new group folder above the "lines" group, and name it "laces." Choose a color for your laces and begin adding the shapes as the example below shows. If you need to use your initial sketch as a guide or reference, you can unhide it and move it above the rest of the layers and groups while you are working on this part.
15. Add a Stroke to One Lace Shape

Once you’ve added the laces, you will need to add a Stroke to the outside of each shape. To do this, select your first laces shape layer and, from the FX menu at the bottom of the Layers tab, choose Stroke. A menu, as shown below, will appear. Choose black for the color fill, and set the size to 1px. The Stroke effect is one of the few Photoshop effects which will scale along with the rest of your vector shapes, making it a useful tool. Once you have set the Stroke effect to the same settings as shown, click OK. Your lace shape layer will now have a thin black outline.
16. Apply the Layer Style to the Rest of the Laces

To add this Stroke to the rest of the shapes, rather than doing each individually, RIGHT-CLICK on the shape layer in the Layers tab, and choose the option Copy Layer Style. You can then select the rest of the laces shape layers by clicking the first/bottom one, holding down Shift, and clicking the top layer. This will select both the layers you have clicked, and all those in between. You can then Right-click and choose Paste Layer Style. This will leave all your laces shape layers with the black Stroke effect. You will be left with something that looks like the image below. You may need to rearrange your shape layers to ensure the laces display correctly.
17. Add Motifs to the Boots

Here I’ve added the heart motifs to the boots, leaving the base layers complete and ready for shading.
18. Use Clipping Masks to Assist with Shading the Laces

To begin shading, I have started with the laces. Use a darker, slightly more saturated color than your base color to add the shading. Place your shade shape layer just above the lace shape layer to which you are adding shade and then, to keep the shading within the Stroke lines you previously added, create a Clipping Mask to the layer below. To do this, RIGHT-CLICK the shade shape layer and select Create Clipping Mask. This will attach your shading shape layer to the base color shape layer, and keep the Stroke lines visible. Once you’ve done all the laces in this way, it will look like the example below.
19. Add Further Shading to the Boots

Once you have finished shading the laces, you can continue on to shading the rest of the boots, and move forward to shading the rest of the clothing in the same method as above. For more in-depth shading help, see my previous tutorial, Creating a Vector Anime Character in Adobe Photoshop – Part 2: Coloring.
20. Finish off the Shading

Once you have completed the shading, you will have something similar to the example below, a fully colored and shaded simple outfit.
You’re Finished! Now You Know the Basics, Why Not Try Other Designs?
Here’s a couple of other ideas for you to try - notice how the patterns can make the clothing stand out and become more interesting. Patterns and designs can easily be created in vector using the Shape Tool, and Custom Shape Tool, in Photoshop, and it is necessary to note that standard Photoshop Patterns are not vector, and so you would need to create your pattern or design each shape at a time (see the leggings), or by duplicating shapes and using Clipping Masks to create a seamless pattern (see the dress).
Experimenting with the Multiply layer style and different Opacities when shading can mean that your newly created pattern or design will also be shaded without the need for further shade layers. This is done in the same way as regular shading, but you would change the layer style from Normal to Multiply, and possibly change the layer opacity as well, depending on the darkness of the shade. Both the dress and the leggings are shaded with the Multiply layer style.
Thanks for joining me for this tutorial and, as usual, I’d love to see what you’ve created!
With the information we provide about How to design clothes for beginners
, We hope you can be helped and hopefully set a precedent with you . Or also you can see our other references are also others which are not less good about jamilton upholstery
, So and we thank you for visiting.
open tutorial sew : http://design.tutsplus.com/tutorials/a-beginners-guide-to-drawing-a-basic-outfit-on-a-character-in-photoshop--vector-9775


0 komentar:
Post a Comment