FUN SEWING | Every Day In Kebaya
 |
| FUN SEWING | Every Day In Kebaya |
How to make a pattern for a new tick kebaya - Hallo beautiful peoples,
I have to tell you that I’ve brought so much trouble when I decided the project of this post. All I can say right now is; OK! It’s not a weekend project, it’s a three weekends project.
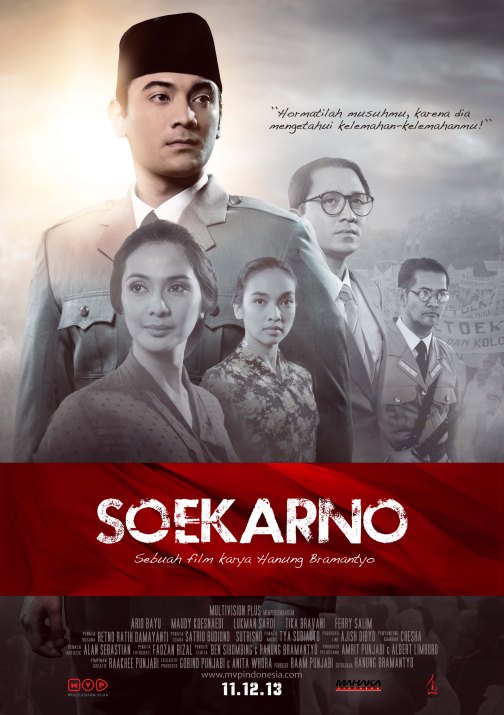
The idea was popped up in my mind when I watched a movie called ‘Soekarno’. The movie is a biography of Indonesia’s first president named Soekarno. Apart from the movie content, the ladies costumes in the movie was the most interesting thing for me.
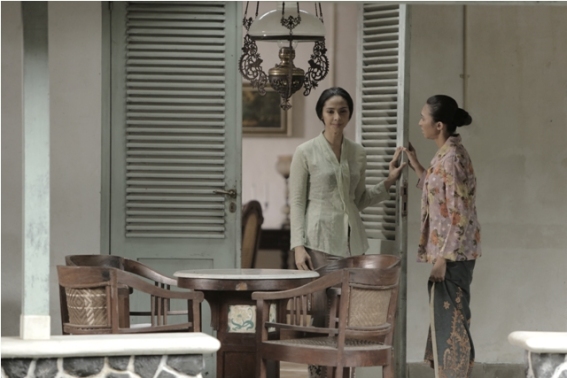
Photo resource : http://www.filmsoekarno.com

Photo resource : http://www.filmsoekarno.com
The set of the movie is Indonesia in 1940’s to 1960’s. During that period ‘kebaya’ was still a female daily outfit. The first lady, the second lady, the third lady of Soekarno (well, our first president have more than one wife) all of them wore kebaya every day.
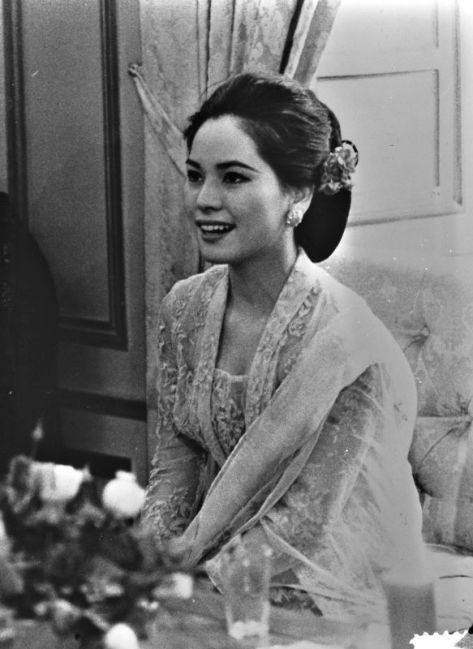
Dewi Soekarno (one of Soekarno’s wife)
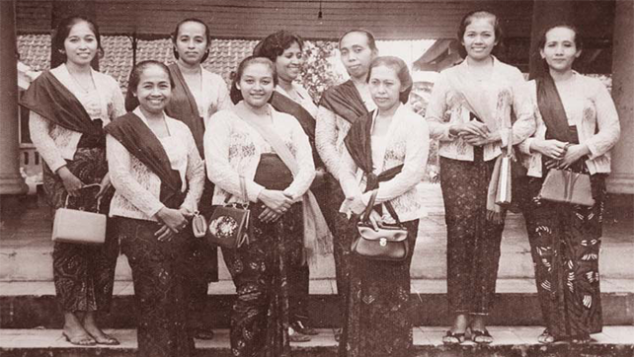
Picture of some ladies in kebaya.
Nowadays, the habit of wearing kebaya every day is no longer here. Kebaya is still our female national costume. But to wear it in any occasions? Not so many people consider it. The materials of kebaya, nowadays, is not comfortable to be worn everyday. In 40’s to 60’s, kebaya was a daily outfit because it came with such a comfort materials like cottons.
Some designers are trying to put ‘kebaya’ back on her popularity on 40’s to 60’s and I want to take a part on this champagne. Remember this post of my legacy classic kebaya? Using this ‘copy a garment’s pattern techniques’, I have copied the pattern of that black kebaya. In this week post, I want to share the pattern of classic kebaya (famous as kebaya lawasan) and how to turn it into a wearable kebaya for your daily activities.
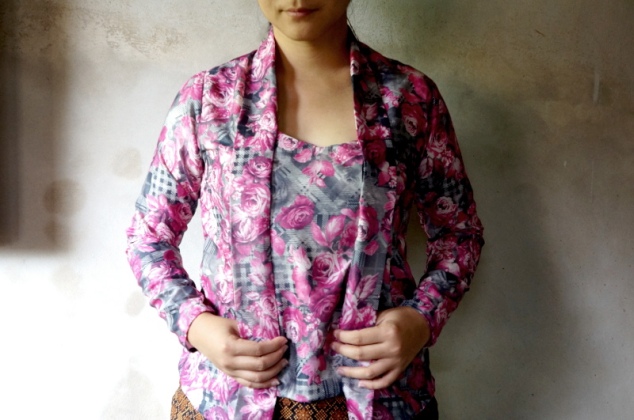
First of all, this is a classic kebaya that I’ve made;
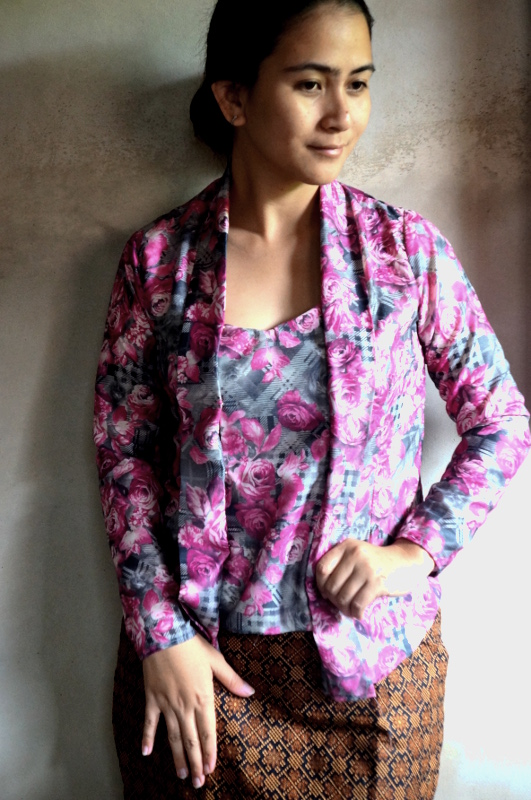
The original version of ‘kebaya lawasan’ is similar like a blazer. The different is on the long straight collar and that small rectangle sheet at center front (called ‘kutu baru’), which for me a very clever idea to make this outfit more flexible for some additional weight.😉
So here is the pattern;
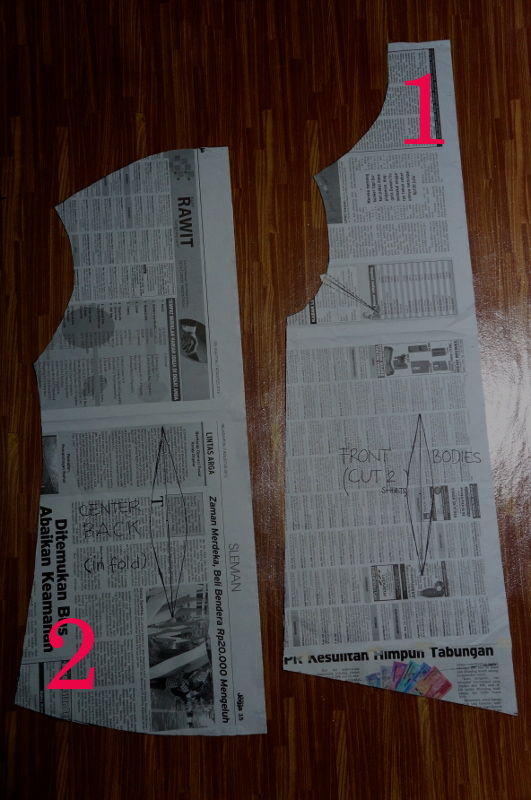
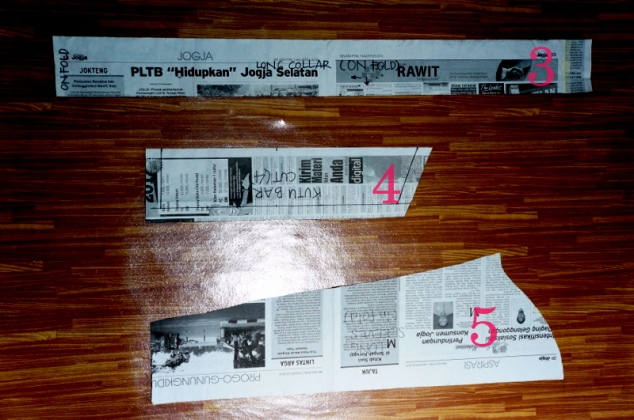
PATTERN
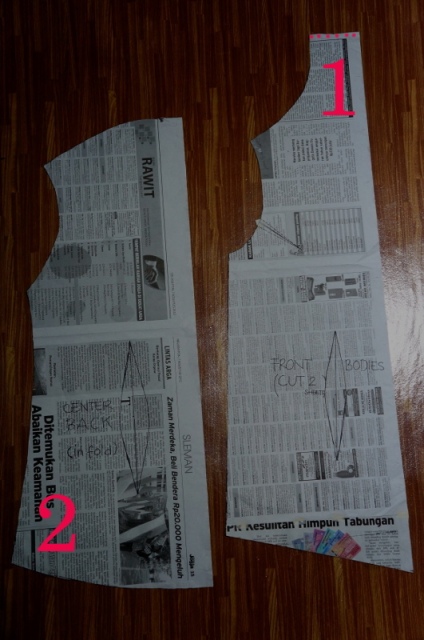
1. Front Bodies : 2 Cuts
2. Center Back : in fold
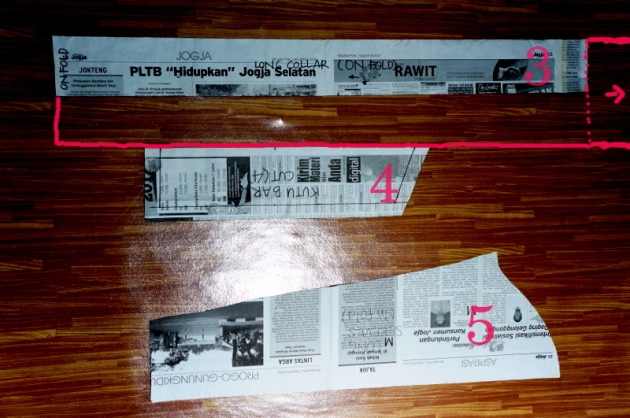
3. Straight Long Collar: in fold, 2 cuts
4. The ‘Kutu Baru’ : can be just a rectangle that will cover the center front of your body.
5. Long Sleeves : in fold, 2 cuts (just like a regular top’s sleeves pattern)
STEP BY STEP
1. Sew all the darts
2. Take the 2 cuts of pattern number 1. Meet the top straight edges together (the smallest edges), pin (right side together), and sew. This stitch will be your top center back part of your kebaya. (I’ll leave pink dots on the [art that you have to sew)
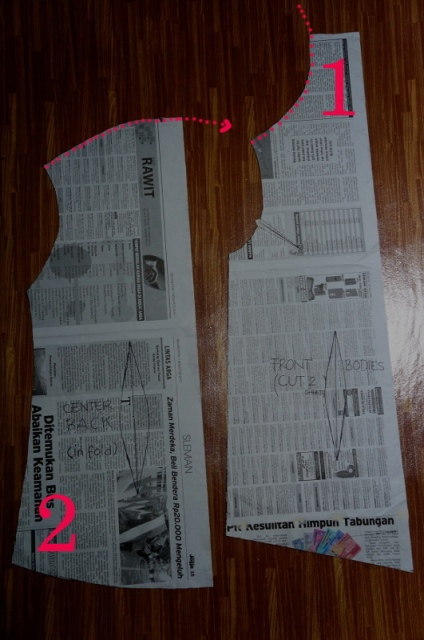
3. Take the cut of pattern number 2. Meet the top curve of that pattern with the cuve that created by the previous step, make sure that the stitch that you’ve made before placed in the center.
4. Connect the 2 cuts of pattern number 3, pin, and sew.This will be the collar part.
5. Fold the long collar part, pin it unto the bodice part.
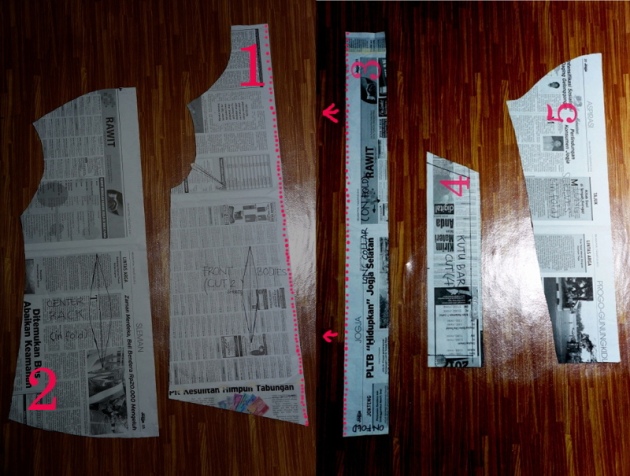
6. Connect the side part of your front and back part, pin and sew.
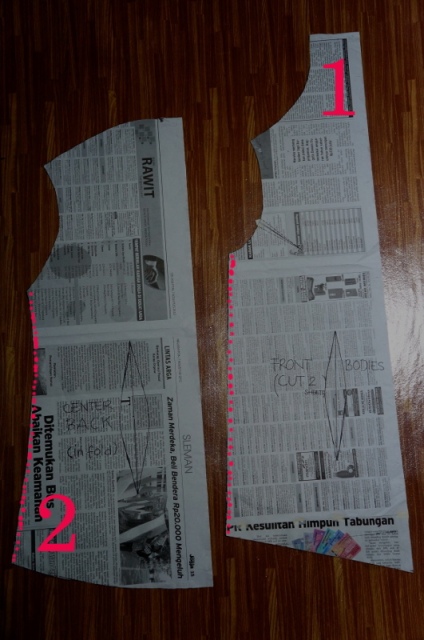
You should get something similar like this;
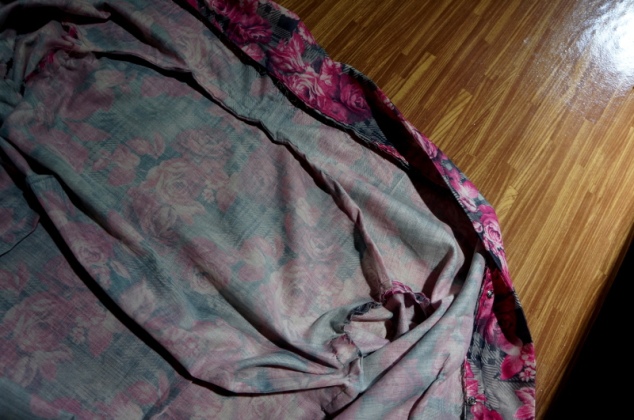
7. Here you are going to sew the sleeves part, just like how you sew a regular button up.
8. Meet the 2 cuts of ‘kutu baru’ (can be a regular rectangle) just like you sew a pillow case. Left one side edge unstitched. Pin the unstitch edge unto the inner part of the collar (one side) and sew some buttons in the other inner side.
Pfffttttt…. By that point, I’ve made one copy of my classic kebaya. But my goal on this post didn’t stop there. My goal was to create some more contemporary versions of classic kebaya for daily outfit, not only for costume option. That is how I started a big trouble for myself.
We all know that I am a beginner on sewing. I’ve never made any button up or other basic blouse before. That amateur level and the age of my ‘Butterfly’ sewing machine, took me more than 12 working hours to finished the first kebaya. Plus I’m not a very patient tailor. So I’ve spent the last 3 weeks to, again and again, re-motivated myself to…. finish this project!
Finally… After 3 weeks struggled with myself… Here I present;
Ovelap Sleeves Classic Kebaya

with this pattern for the sleeves
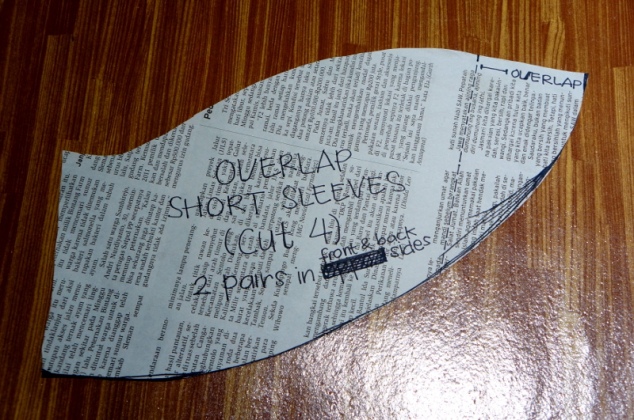
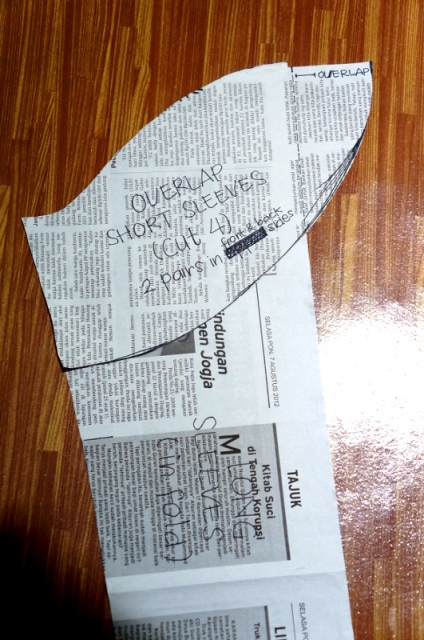
And the ‘Sleeveless Classic Kebaya’
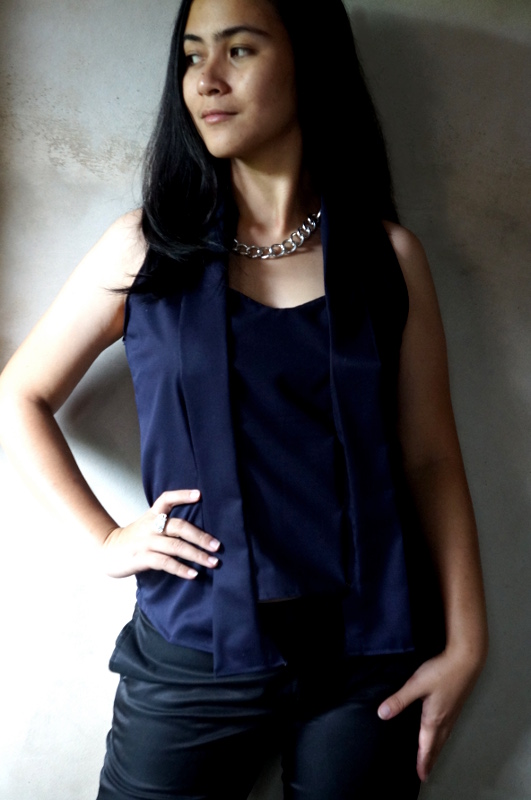
Oh well, friends. I’m glad that at least I’ve finish the project. I’m so sorry that I was too lazy to took pictures on the process. But I hope the instructions will be enough. If not, please ask me. I’ll be happy to answer.
Now, let’s hope I will not challenge myself with another big trouble, so I can see you again next week.
Thank you for stopped by.:)
With the information we provide about How to make a pattern for a new tick kebaya
, We hope you can be helped and hopefully set a precedent with you . Or also you can
see our other references are also others which are not less good about Tips for Sewing a Perfect Collar
, So and we thank you for visiting.
open tutorial sew : https://proyekakhirminggu.wordpress.com/2014/02/10/fun-sewing-every-day-in-kebaya/


0 komentar:
Post a Comment